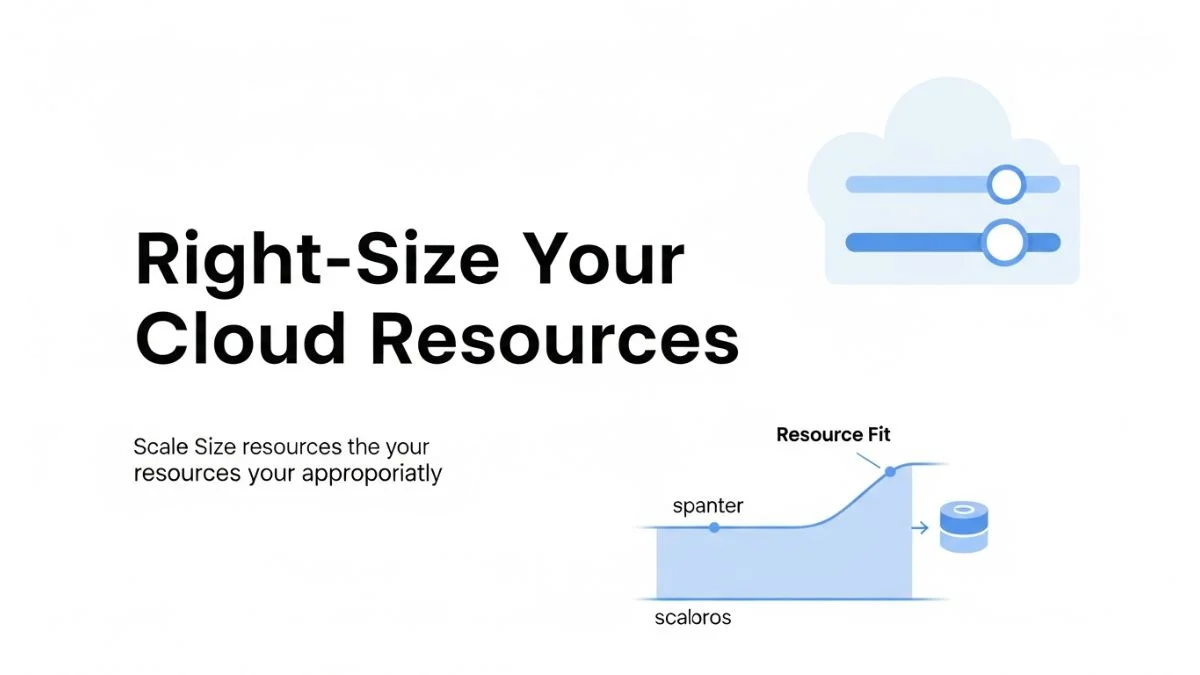
How to Right-Size Your Cloud Resources
How to Right-Size Your Cloud Resources
Cloud resources provisioned during initial development or scaled up during emergencies rarely get reviewed for appropriateness afterward. A database provisioned with 32GB RAM to handle a load spike continues running at 5% utilization months later, costing $400/month when a $50/month instance would suffice. VMs sized for anticipated growth that never materialized waste 70% of their capacity indefinitely. Right-sizing—matching resource specifications to actual requirements—represents the single highest-ROI cost optimization for most organizations, delivering 20-40% savings with minimal risk when done systematically.
The challenge isn't identifying over-provisioned resources—cloud provider tools highlight underutilized instances clearly. The challenge is understanding which resources can be safely downsized without impacting performance, how to validate the change won't cause problems, and how to prevent resources from becoming oversized again after optimization. This requires analyzing usage patterns over time, understanding workload characteristics, and implementing monitoring that catches performance degradation before it affects users.
This guide covers systematic right-sizing methodology for compute instances, databases, storage, and Kubernetes workloads across AWS, Azure, and Google Cloud. You'll learn how to analyze utilization metrics accurately, identify safe downsizing opportunities, validate changes in non-production environments, and implement gradual rollouts that minimize risk. The focus is on practical implementation patterns that engineering teams can execute without requiring months of organizational change.
Understanding Why Resources Become Oversized
Resources become oversized through predictable patterns. Understanding these patterns helps prevent future over-provisioning while addressing existing waste.
The most common cause: provisioning for anticipated future load that never materializes. Engineers launch a service expecting exponential growth, provision infrastructure for 10x current capacity "to be safe," and the service plateaus at 2x initial load. The infrastructure sized for 10x continues running indefinitely at 20% utilization because no one remembers to revisit the provisioning decision.
Second pattern: emergency scaling during incidents that's never rolled back. A database hits CPU limits during a traffic spike, an engineer scales from db.t3.large to db.r5.2xlarge to restore service, and the incident resolves. The database continues running on the larger instance permanently because reverting requires conscious action and analysis that never happens during busy post-incident periods.
Third pattern: copy-paste provisioning from production to non-production. A production database runs on db.r5.xlarge for good reasons—high availability requirements, consistent performance needs. The development and staging databases get provisioned identically because it's easier to copy the Terraform than to analyze actual requirements. Development databases that serve 3 developers run on the same hardware as production databases serving 10,000 users.
Analyzing Compute Instance Utilization
Right-sizing compute instances requires analyzing CPU, memory, network, and disk utilization over extended periods to understand actual resource consumption versus provisioned capacity.
CPU Utilization Analysis
CPU utilization below 20% average with peaks below 40% indicates clear over-provisioning opportunity. However, analyzing average CPU alone misses nuance—workloads with occasional CPU spikes need headroom even if average utilization is low.
Analyze CPU metrics over 30 days minimum, preferably 60-90 days to capture seasonal patterns and periodic workloads. Use maximum CPU over 5-minute windows rather than instantaneous peaks to filter noise. On AWS, query CloudWatch metrics:
aws cloudwatch get-metric-statistics \
  --namespace AWS/EC2 \
  --metric-name CPUUtilization \
  --dimensions Name=InstanceId,Value=i-1234567890abcdef0 \
  --start-time 2026-01-01T00:00:00Z \
  --end-time 2026-02-28T23:59:59Z \
  --period 300 \
  --statistics Maximum,Average \
  --output table
Instances with average CPU below 15% and maximum below 30% are strongly over-provisioned—downsize by one or two instance sizes. Instances averaging 15-30% CPU with maximums below 50% can likely downsize one instance size. Instances averaging above 40% or with regular peaks above 70% are appropriately sized or under-provisioned.
The exception: burstable instances (T-series on AWS, B-series on Azure). These instances use CPU credits for burst performance and throttle when credits exhaust. A t3.medium averaging 20% CPU might be perfectly sized because it relies on burst capability. Check CPU credit balance metrics—if credits regularly deplete, the instance is undersized despite low average CPU.
Memory Utilization Patterns
Memory analysis is trickier than CPU because cloud providers don't automatically collect memory metrics for VMs. You must install monitoring agents (CloudWatch Agent on AWS, Azure Monitor Agent, GCP Ops Agent) to track memory usage.
After enabling memory monitoring, analyze maximum memory utilization over 30+ days. Memory-based right-sizing is less forgiving than CPU—running out of memory causes hard failures while CPU saturation causes slowness. Maintain 20-30% memory headroom after right-sizing.
An instance using maximum 40% memory can safely downsize to an instance type with 60% of current memory capacity. An instance using maximum 70% memory is appropriately sized—don't downsize. An instance consistently using 85%+ memory may be undersized.
For AWS EC2 instances with CloudWatch Agent configured:
aws cloudwatch get-metric-statistics \
  --namespace CWAgent \
  --metric-name mem_used_percent \
  --dimensions Name=InstanceId,Value=i-1234567890abcdef0 \
  --start-time 2026-01-01T00:00:00Z \
  --end-time 2026-02-28T23:59:59Z \
  --period 3600 \
  --statistics Maximum,Average \
  --output table
Cross-reference memory and CPU utilization. Instances with low CPU and low memory can downsize aggressively. Instances with low CPU but high memory need memory-optimized instances (R-series on AWS, E-series on Azure), not just smaller general-purpose instances.
Database Right-Sizing Strategy
Databases require more conservative right-sizing because performance degradation directly impacts application functionality. A database that responds in 50ms versus 200ms can mean the difference between acceptable and unacceptable user experience.
Analyzing Database Performance Metrics
For AWS RDS, analyze several metrics together: CPU Utilization, FreeableMemory, ReadIOPS, WriteIOPS, and DatabaseConnections over 30-90 days. A database with CPU below 20%, freeable memory above 60% of total memory, and IOPS below 50% of provisioned capacity is over-provisioned.
Query RDS CPU utilization:
aws cloudwatch get-metric-statistics \
  --namespace AWS/RDS \
  --metric-name CPUUtilization \
  --dimensions Name=DBInstanceIdentifier,Value=production-db \
  --start-time 2026-01-01T00:00:00Z \
  --end-time 2026-02-28T23:59:59Z \
  --period 3600 \
  --statistics Maximum,Average,Minimum
Pay attention to daily patterns. Databases commonly show high utilization during business hours and near-zero utilization nights and weekends. The relevant metric is peak utilization during active periods, not average across 24 hours including idle times.
For databases averaging 30% CPU during business hours with peaks below 50%, downsizing one instance size is usually safe. For databases averaging 50-60% CPU with peaks approaching 80%, they're appropriately sized—don't change. For databases regularly exceeding 80% CPU or showing elevated query latencies, they're undersized.
Testing Database Downsizing Safely
Never right-size production databases directly. The testing sequence:
- Create a read replica of the production database on the proposed smaller instance size
- Monitor the replica's performance metrics for 7-14 days under production read load
- If replica performance remains acceptable (CPU below 70%, query latency similar to primary), proceed to testing with write workload
- Promote the replica to a standalone instance and test with application write traffic in staging environment
- If staging testing shows acceptable performance, schedule production downgrade during maintenance window
The read replica testing is critical—it validates the smaller instance can handle actual production workload before risking production availability. The cost of running a test replica for two weeks ($30-100 depending on instance size) is trivial compared to the cost of production performance problems.
During production downgrade, monitor performance metrics closely for 24-48 hours. Have a rollback plan ready—AWS allows modifying instance class back to the larger size with minimal downtime. If CPU regularly exceeds 80% or query latency degrades, roll back immediately.
Right-Sizing Database Storage
Database storage right-sizing differs from compute right-sizing. You can only increase storage, never decrease it (without dump and restore). The goal is stopping unnecessary storage growth and choosing appropriate storage types.
For RDS instances using gp3 SSD storage, you provision baseline IOPS and throughput independently from storage size. If you provisioned 1TB storage because you needed high IOPS on older gp2 storage (where IOPS scaled with size), you can now use 200GB gp3 storage with separately provisioned IOPS, saving $120/month in storage costs.
Monitor FreeStorageSpace metrics. If free storage consistently exceeds 60% of provisioned capacity and growth rate is slow, you over-provisioned storage. For future database creation, provision closer to actual needs—you can always increase later.
Kubernetes Resource Right-Sizing
Kubernetes resource requests and limits create a unique right-sizing challenge. Pods specify resource requests (guaranteed allocation) and limits (maximum usage). Over-specified requests waste node capacity; under-specified requests cause CPU throttling or OOM kills.
Analyzing Pod Resource Usage
Use Vertical Pod Autoscaler (VPA) in recommendation mode to analyze actual resource usage and suggest appropriate requests and limits. VPA observes pod resource consumption over time and calculates optimal settings.
Install VPA in your cluster:
kubectl apply -f https://github.com/kubernetes/autoscaler/releases/latest/download/vertical-pod-autoscaler.yamlCreate a VPA resource in recommendation mode for a deployment:
apiVersion: autoscaling.k8s.io/v1
kind: VerticalPodAutoscaler
metadata:
  name: web-service-vpa
spec:
  targetRef:
    apiVersion: "apps/v1"
    kind: Deployment
    name: web-service
  updateMode: "Off"  # Recommendation only, no automatic updates
After 24-48 hours, check VPA recommendations:
kubectl describe vpa web-service-vpaThe output shows recommended requests and limits based on observed usage. Compare recommendations to current settings. If current requests are 2x or more higher than recommendations, you're wasting node capacity. If limits are significantly higher than actual maximum usage, they're unnecessarily permissive (though high limits are less problematic than high requests).
Implementing Pod Right-Sizing
Update deployment specs with more accurate resource requests based on VPA recommendations, but don't match recommendations exactly—maintain 20-30% headroom for traffic spikes and variability.
If VPA recommends 200m CPU and 256Mi memory based on observed usage, set requests to 250-300m CPU and 300-350Mi memory. This provides headroom while eliminating severe over-provisioning.
apiVersion: apps/v1
kind: Deployment
metadata:
  name: web-service
spec:
  template:
    spec:
      containers:
      - name: web-service
        resources:
          requests:
            memory: "300Mi"
            cpu: "250m"
          limits:
            memory: "500Mi"
            cpu: "500m"
Roll out changes gradually using progressive deployment strategies. Update 10-20% of pods initially, monitor for 24-48 hours, then expand to 50%, then 100%. This catches performance issues before they affect all users.
Right-Sizing Kubernetes Nodes
After optimizing pod resource requests, evaluate node sizes. If pods now request less resources, you may run the same workload on fewer or smaller nodes.
Calculate total resource requests across all pods and compare to node capacity. If total requests are below 50% of node capacity, you're over-provisioned. Use cluster autoscaler to automatically adjust node count based on pod scheduling needs.
For node types, analyze whether you need compute-optimized, memory-optimized, or general-purpose instances based on pod resource patterns. If pods request high memory but low CPU, memory-optimized nodes (r5 on AWS, E-series on Azure) provide better cost efficiency than general-purpose nodes with the same memory.
Storage Right-Sizing and Optimization
Storage costs accumulate from excessive size, inappropriate storage tiers, and unused volumes or snapshots.
EBS Volume Right-Sizing
Monitor volume utilization using CloudWatch metrics or OS-level tools. For EBS volumes, there's no CloudWatch metric for used space—you must monitor from within the instance using df or equivalent.
Volumes with 40% or less utilization are over-provisioned. However, shrinking EBS volumes requires creating snapshots, creating new smaller volumes from snapshots, and attaching them—a manual, disruptive process. For existing volumes, focus on preventing future over-provisioning and choosing appropriate volume types rather than shrinking existing volumes.
For gp2 volumes provisioned large solely for IOPS (gp2 provides 3 IOPS per GB), migrate to gp3 where you specify IOPS independently from size. A 1TB gp2 volume (3000 IOPS, $100/month) can become a 100GB gp3 volume with 3000 provisioned IOPS ($10 for storage + $9 for IOPS = $19/month), saving $81/month.
Storage Tier Optimization
Use lifecycle policies to automatically transition infrequently accessed data to cheaper storage tiers. S3 offers multiple tiers with different cost structures:
- S3 Standard: $0.023/GB/month, optimized for frequent access
- S3 Intelligent-Tiering: Automatic tiering based on access patterns
- S3 Standard-IA: $0.0125/GB/month, for infrequent access (minimum 30-day storage)
- S3 Glacier Instant Retrieval: $0.004/GB/month, millisecond retrieval, minimum 90-day storage
- S3 Glacier Flexible Retrieval: $0.0036/GB/month, minutes-hours retrieval
- S3 Glacier Deep Archive: $0.00099/GB/month, 12-hour retrieval
Create lifecycle rules that transition objects based on age and access patterns:
{
  "Rules": [
    {
      "Id": "Archive old data",
      "Status": "Enabled",
      "Transitions": [
        {
          "Days": 90,
          "StorageClass": "STANDARD_IA"
        },
        {
          "Days": 365,
          "StorageClass": "GLACIER_IR"
        }
      ],
      "Expiration": {
        "Days": 2555
      }
    }
  ]
}
This policy moves objects to Standard-IA after 90 days, Glacier Instant Retrieval after 365 days, and deletes after 7 years. For a bucket with 10TB data where 70% is older than 90 days, this saves approximately $140/month in storage costs.
Automated Right-Sizing Workflows
Manual right-sizing is time-consuming and easy to defer. Automated workflows that identify opportunities and facilitate implementation ensure continuous optimization.
Building a Right-Sizing Recommendation System
Create a scheduled Lambda function or scheduled job that queries CloudWatch metrics for all resources, analyzes utilization patterns, and generates right-sizing recommendations:
import boto3
from datetime import datetime, timedelta

cloudwatch = boto3.client('cloudwatch')
ec2 = boto3.client('ec2')

def analyze_instance(instance_id):
    # Query 30 days of CPU utilization
    end_time = datetime.utcnow()
    start_time = end_time - timedelta(days=30)

    response = cloudwatch.get_metric_statistics(
        Namespace='AWS/EC2',
        MetricName='CPUUtilization',
        Dimensions=[{'Name': 'InstanceId', 'Value': instance_id}],
        StartTime=start_time,
        EndTime=end_time,
        Period=3600,
        Statistics=['Average', 'Maximum']
    )

    datapoints = response['Datapoints']
    if not datapoints:
        return None

    avg_cpu = sum(d['Average'] for d in datapoints) / len(datapoints)
    max_cpu = max(d['Maximum'] for d in datapoints)

    # Generate recommendation
    if avg_cpu < 15 and max_cpu < 30:
        return {
            'instance_id': instance_id,
            'avg_cpu': avg_cpu,
            'max_cpu': max_cpu,
            'recommendation': 'Downsize 2 instance sizes',
            'potential_savings': 'High'
        }
    elif avg_cpu < 30 and max_cpu < 50:
        return {
            'instance_id': instance_id,
            'avg_cpu': avg_cpu,
            'max_cpu': max_cpu,
            'recommendation': 'Downsize 1 instance size',
            'potential_savings': 'Medium'
        }

    return None

# Analyze all running instances
instances = ec2.describe_instances(
    Filters=[{'Name': 'instance-state-name', 'Values': ['running']}]
)

recommendations = []
for reservation in instances['Reservations']:
    for instance in reservation['Instances']:
        rec = analyze_instance(instance['InstanceId'])
        if rec:
            recommendations.append(rec)

# Output recommendations to SNS, Slack, or CloudWatch Logs
print(f"Found {len(recommendations)} right-sizing opportunities")
Run this script weekly and send results to engineering teams via Slack or email. Include estimated monthly savings to prioritize high-impact opportunities. The visibility encourages action on right-sizing opportunities that would otherwise go unnoticed.
Implementing Guardrails Against Over-Provisioning
Prevent future over-provisioning through policy-based controls. Use AWS Service Control Policies, Azure Policy, or Google Cloud Organization Policies to restrict provisioning of excessively large instances without approval.
Example AWS SCP that denies launching instances larger than 8xlarge without specific exemption tag:
{
  "Version": "2012-10-17",
  "Statement": [
    {
      "Effect": "Deny",
      "Action": "ec2:RunInstances",
      "Resource": "arn:aws:ec2:*:*:instance/*",
      "Condition": {
        "StringLike": {
          "ec2:InstanceType": [
            "*.16xlarge",
            "*.24xlarge",
            "*.32xlarge"
          ]
        },
        "StringNotEquals": {
          "aws:RequestTag/AllowLargeInstance": "true"
        }
      }
    }
  ]
}
This doesn't prevent provisioning large instances when legitimately needed, but requires conscious decision-making through tagging rather than allowing unrestricted access to largest instance types.
Measuring Right-Sizing Impact
Track metrics that demonstrate right-sizing value and identify areas needing further optimization.
Key Metrics to Monitor
Resource efficiency ratio: (Average utilization / Provisioned capacity) × 100. Target 60-80% for compute resources. Below 40% indicates significant over-provisioning. Above 85% suggests under-provisioning risk.
Cost per unit of work: Total infrastructure cost divided by business metric (requests served, users, transactions processed). Track over time—effective right-sizing decreases cost per unit while maintaining or improving performance.
Right-sizing coverage: Percentage of resources that have been analyzed and right-sized in the past 90 days. Target 80%+ coverage. Low coverage indicates right-sizing isn't happening systematically.
Savings realized: Sum of monthly cost reductions from right-sizing implementations. Calculate as (old monthly cost - new monthly cost) × months since change. This demonstrates business value and justifies investment in right-sizing efforts.
Build dashboards that surface these metrics to engineering teams. Make resource efficiency visible alongside traditional metrics like uptime and latency. What gets measured gets managed—if efficiency is invisible, it won't improve.
Right-Sizing for Different Environments
Production, staging, and development environments require different right-sizing approaches based on risk tolerance and usage patterns.
Production Right-Sizing: Conservative Approach
Production right-sizing requires careful analysis, testing, and gradual rollout. The cost of performance degradation outweighs cost savings from aggressive optimization.
Guidelines for production:
- Maintain 30-40% headroom above observed peak utilization
- Test all changes in staging first with production-like load
- Implement changes during maintenance windows with rollback plans
- Monitor performance metrics closely for 48-72 hours post-change
- Downsize one instance size at a time, waiting weeks between changes
For critical production databases and services, err on the side of over-provisioning. A 20% cost reduction isn't worth risking user-facing performance issues. Focus production right-sizing on clearly over-provisioned resources (40%+ average utilization) rather than aggressively optimizing everything.
Non-Production: Aggressive Optimization
Development and staging environments tolerate much more aggressive right-sizing. A staging database that responds in 200ms instead of 50ms doesn't impact users. Performance degradation is acceptable if it stays within bounds where testing remains valid.
For non-production environments:
- Downsize aggressively—even to 50% of current resources if utilization supports it
- Use cheaper instance types (burstable, previous generation)
- Implement automated start/stop to run only when needed
- Share resources where possible instead of dedicated instances per environment
A common pattern: production database on db.r5.xlarge ($350/month), staging on db.t3.large ($68/month), development on db.t3.medium ($34/month). Same application, same schema, 10x cost difference due to appropriate environment-specific sizing.
Frequently Asked Questions
How often should I review and right-size resources?
Review quarterly for production resources, monthly for non-production. Newly launched services need more frequent review (monthly for first 3-6 months) as usage patterns stabilize. Automate the identification of over-provisioned resources weekly, but implement changes on a planned schedule rather than reactively. Establish a regular "right-sizing day" monthly or quarterly where teams review recommendations and implement approved changes together.
What's the risk of right-sizing production databases?
The primary risk is performance degradation—query latency increases, CPU saturation during peak loads, memory pressure causing swapping. Mitigate by testing thoroughly with read replicas, downsizing only one size at a time, monitoring closely post-change, and having rollback procedures ready. For databases averaging below 30% CPU with peaks below 50%, risk is minimal. For databases averaging 40-50% CPU, risk increases but remains manageable with proper testing. Never downsize databases averaging above 60% CPU or showing any performance issues at current size.
Can I right-size instances without downtime?
For EC2 instances in Auto Scaling Groups, yes—launch new smaller instances, shift traffic via load balancer, terminate old instances. For standalone instances, AWS allows resizing with brief downtime (typically 5-15 minutes stop/start cycle). For RDS databases, instance class changes cause brief downtime (usually 1-5 minutes) during the modification. Multi-AZ RDS instances minimize downtime through failover patterns. For zero-downtime requirements, implement changes through blue/green deployments or traffic shifting approaches rather than in-place modifications.
How do I right-size when traffic is growing?
Analyze growth rate alongside current utilization. If traffic is growing 10% monthly and current utilization is 40%, you have months before capacity becomes constrained—right-size now and re-evaluate quarterly. If traffic is growing 50% monthly and utilization is already 60%, don't right-size downward—focus on scaling strategy instead. Use trend analysis in CloudWatch or monitoring tools to project when current capacity will be exhausted, and plan right-sizing or upsizing decisions based on that timeline.
What tools automatically right-size resources?
AWS Compute Optimizer provides right-sizing recommendations for EC2, Auto Scaling Groups, EBS volumes, and Lambda functions based on CloudWatch metrics. Azure Advisor offers similar recommendations for Azure resources. Google Cloud Recommender provides right-sizing suggestions for GCE instances. Kubernetes Vertical Pod Autoscaler can automatically adjust pod resource requests. Third-party tools like CloudHealth, Spot by NetApp, and Densify provide more sophisticated analysis and automation. However, automatic implementation of right-sizing (versus recommendations) remains risky—use automation for analysis and recommendations, human review for approval, automation for execution.
Should I right-size or implement auto-scaling?
Both, not either/or. Right-sizing sets appropriate baseline capacity; auto-scaling handles variable demand. An over-provisioned auto-scaling group wastes money even when scaled to minimum. Right-size first to establish efficient baseline capacity, then implement auto-scaling to handle traffic variability. For workloads with consistent 24/7 load, right-sizing alone suffices. For variable workloads, right-sizing plus auto-scaling delivers optimal efficiency.
How much can I typically save through right-sizing?
Organizations without systematic right-sizing practices typically find 20-40% savings opportunities in compute costs. Well-managed organizations still find 10-15% savings from gradual resource creep over time. The highest savings come from non-production environments (often 50-70% over-provisioned) and services launched during high-growth periods that have since stabilized. Track savings separately for production versus non-production—production savings are harder won but more valuable due to scale, while non-production savings are easier to achieve.
What if right-sizing causes performance problems?
Roll back immediately if problems affect users. For EC2, stop the instance and modify back to the previous instance type. For RDS, modify the instance class back (requires brief downtime). For containerized workloads, roll back deployment to previous resource specifications. This is why testing in non-production, gradual rollouts, and close monitoring are essential—they catch problems before widespread user impact. If right-sizing consistently causes issues, your utilization analysis may be flawed (analyzing wrong time period, missing traffic spikes, ignoring non-CPU constraints) or your headroom calculations too aggressive.
How do I convince my team to prioritize right-sizing?
Quantify the opportunity in monthly dollars saved and annual impact. "We can save $5,000/month ($60,000/year) by right-sizing 15 over-provisioned instances" resonates better than "our average CPU utilization is low." Start with non-production environments where risk is minimal and savings are easy—demonstrating success builds confidence for production right-sizing. Automate the identification and reporting of opportunities so it requires minimal engineering effort. Create a culture where resource efficiency is valued alongside performance and reliability, measured in team metrics, and celebrated when achieved.
Conclusion
Right-sizing delivers consistent 20-40% cost reductions for organizations that implement systematic analysis and optimization processes. The methodology is straightforward: analyze utilization metrics over 30-90 days, identify resources with sustained low utilization, test proposed changes in non-production environments, implement changes gradually with monitoring, and validate that performance remains acceptable.
Start with non-production environments where aggressive optimization carries minimal risk, then apply more conservative approaches to production resources. Automate opportunity identification through scheduled analysis of CloudWatch metrics and cloud provider recommendations, but keep humans in the decision loop for production changes. Implement monitoring that catches performance degradation early, and maintain rollback procedures for quick recovery if issues arise.
Right-sizing isn't a one-time project but an ongoing practice. Resources drift toward over-provisioning over time through emergency scaling, anticipated growth that doesn't materialize, and copy-paste provisioning. Establish quarterly right-sizing reviews, automate weekly reporting of over-provisioned resources, and create visibility into resource efficiency alongside traditional performance metrics. What gets measured and reported gets optimized.